関連記事のサムネイルを表示する
どうも,筆者です.
以前,ブログの見た目を変更しようと思い,関連記事を実装した.その際,サムネイル画像が表示されなかったが,先日,修正方法が記事になっていた.
こちらを参考に再度修正を行った.
ヘッダの修正
Java Script は,普段使わないので,間違えないように修正する.以下は,上記のサイトの一部引用である.
var title = el.find('title').text(); //ブログタイトル
var articleLink = el.find('link').attr('href'); //ブログタイトル
var overview = el.find('summary').text(); //ブログ概要
そして,記事を参考に,imgSrc を articleLink の下に挿入する.後で見たときに分かるように,ブログイメージとコメントを入れておいた.
var title = el.find('title').text(); //ブログタイトル
var articleLink = el.find('link').attr('href'); //ブログタイトル
var imgSrc = el.find('link[type="image/png"]').attr('href'); //ブログイメージ ←追加部分
var overview = el.find('summary').text(); //ブログ概要
最後に,html の部分をサイトの通り,書き換える.この部分は,サイトのものをそのままコピペした.
変更後
デザインの変更をした結果,以下のようになった.
修正したことで,問題なく動作しているようだ.良かった.
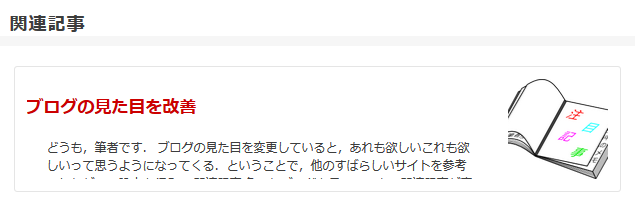
ブログの見た目を改善
どうも,筆者です.
ブログの見た目を変更していると,あれも欲しいこれも欲しいって思うようになってくる.ということで,他のすばらしいサイトを参考にしながら,設定を行う.
関連記事
色々なブログを見ていると,関連記事が表示されていることに気付く.これは,設定したいと思い,調べた.以下のサイトで,コードが公開されていたので,記事の数だけ変更して利用させていただいた.
この時,何故か目次の設定(自動生成してくれる JS)が,「記事の下」に HTML で記述されていたので,「記事の上」に移動させておいた.
アイキャッチ画像(サムネイル画像)
関連記事を導入したところで,多少便利になったが,サムネイル画像が表示されないことに気付いた.これも設定していなかったようなので,以下の記事を参考にしながら,設定を行った.
happylife-tsubuyaki.hatenablog.com
サムネイル画像は Inkscape で作成し,アップロードすることにした.ただ,上手に作れないのが難点である.

Raspberry Pi 3 Model B のプリンタサーバーにおいて Windows から PDF が印刷できない問題とその対処法
どうも,筆者です.
Windows で PDF の印刷をする
前回までで,Raspberry Pi をファイルサーバーとプリンタサーバーにできた.問題なく動作していたのだが,Windows で PDF の印刷が出来なかった.Word や Excel は印刷できたのに,PDF だけ印刷できなかった.原因がさっぱり分からない.また,Linux 側では,PDF が印刷できたので,プリンタサーバーとしては動作していると考えた.面倒なことに,Windows 側での印刷の仕組みを勉強する必要が生じた.
ログの出力
Windows で Word を印刷する場合と PDF を印刷する場合の違いを調べるために,ログを見ることにした.Windows はとても親切なので,ログが一切残っていなかった.まずは,ログの残し方から調べる必要があった.
調べるとすぐ出てきた.「イベントビューアー」というものがあるらしい.これで,ログの有効化を行う.Windows 7 の場合は,
- 管理ツールを開く(コントロールパネルにある「システムとセキュリティ」から飛ぶ).
- イベントビューアーを起動する.
- 「アプリケーションとサービス\Microsoft\Windows\PrintService\Operational」を開く.
- 右側にある「操作」から,「ログの有効化」をクリックする.
とすれば良い.
その後,「アプリケーションとサービス\Microsoft\Windows\PrintService\Admin」から,Word を印刷した場合(これは実行可能)のログを見る.問題ない.その後,PDF を印刷した場合(これはエラーを返す)のログを見る.すると,
%UserName% によって所有されているドキュメント %DataFile% をプリンター %PrinterName% で印刷できませんでした。ドキュメントを再度印刷するか、印刷スプーラーを再起動してください。 データの種類: RAW。スプール ファイルのサイズ (バイト): xxx。印刷したバイト数: yyy。ドキュメントの総ページ数: zzz。印刷したページ数: xyz。クライアントのコンピューター: %PCName%。プリント プロセッサで返された Win32 エラー コード: 5。アクセスが拒否されました。
となっていた.アクセスが拒否されているらしい.
アクセス拒否の対処法
これは, TS Easy PrintでイベントID:6161アクセス拒否の件、解決ダー Σ∩グッkametaro.wordpress.com
によると,
直接の原因は、RemoteAppログインに使用したユーザーが、サーバー側のスプールフォルダにアクセスできる権限を持っていないため。
とある.つまり,サーバ側の spool ディレクトリにアクセスできないとのことらしい.という事は,Samba の設定ファイルのうち,
[printers]
   comment = All Printers
   browseable = no
   path = /var/spool/samba
   printable = yes
   guest ok = no
   read only = yes
   create mask = 0700
を
[printers]
   comment = All Printers
   browseable = no
   path = /var/spool/samba
   printable = yes
   guest ok = yes    ## <- ここ
   read only = yes
   create mask = 0700
とすればよいはずである.変更してサービスを再起動し,再度 Windows から PDF の印刷を行うと,印刷できた.これで,問題は解決された.
現状できていること
現状は,ファイルサーバー,プリンタサーバーに加え,スマホから「reboot」と「shutdown」ができるようになっている.他にも色々機能を付けたいと思う.
Raspberry Pi 3 Model B でファイルサーバーとプリンタサーバーを構築する(その 3) Samba のインストールと設定
どうも,筆者です.
前回の続きである. workspacememory.hatenablog.com
今回は,Samba のインストールとその設定を行う.
Samba のインストール
Samba のインストールは,コマンド 1 行で行える.
sudo apt-get install -y samba
外付け HDD のフォーマットとマウント
外付け HDD が正しく接続されているかを確認する.その後,パーティションの設定を行い,フォーマットする.パーティションの設定等は,Raspberry Piでファイルサーバ、Part2 外付けハードディスクの導入編 を参考にした.
# 接続確認
sudo fdisk -l
# パーティションの設定
sudo fdisk /dev/sda
# フォーマット
sudo mkfs.ext4 /dev/sda1
自動マウントのために UUID の取得とマウント先を作成し,設定を記述する.
# マウント先の生成
sudo mkdir /media/hdd1
# UUID の取得
sudo blkid /dev/sda1
# 設定を記述
sudo vim /etc/fstab

### === /etc/fstab の中身 === ###
proc            /proc           proc    defaults          0       0
/dev/mmcblk0p1  /boot           vfat    defaults          0       2
/dev/mmcblk0p2  /               ext4    defaults,noatime  0       1
UUID=abcdefgh-1234-5678-xyzw-123abc456xyz  /media/hdd1         ext4    defaults  0       0  # ここに追加
# a swapfile is not a swap partition, no line here
#   use  dphys-swapfile swap[on|off]  for that

# 再起動しておく
reboot
Samba の設定
その後,共有するディレクトリを作成する.そして,Samba の設定を行う.
pushd /media/hdd1/
# ディレクトリの生成
sudo mkdir share
sudo chown -R nobody:nogroup share
sudo chmod 777 share
popd

# Samba の設定
sudo vim /etc/samba/smb.conf
#
# Sample configuration file for the Samba suite for Debian GNU/Linux.
#
#
# This is the main Samba configuration file. You should read the
# smb.conf(5) manual page in order to understand the options listed
# here. Samba has a huge number of configurable options most of which
# are not shown in this example
#
# Some options that are often worth tuning have been included as
# commented-out examples in this file.
#  - When such options are commented with ";", the proposed setting
#    differs from the default Samba behaviour
#  - When commented with "#", the proposed setting is the default
#    behaviour of Samba but the option is considered important
#    enough to be mentioned here
#
# NOTE: Whenever you modify this file you should run the command
# "testparm" to check that you have not made any basic syntactic
# errors.

#======================= Global Settings =======================

[global]

## Browsing/Identification ###
   dos charset = CP932
   unix charset = UTF8

# Change this to the workgroup/NT-domain name your Samba server will part of
   workgroup = WORKGROUP

# Windows Internet Name Serving Support Section:
# WINS Support - Tells the NMBD component of Samba to enable its WINS Server
#   wins support = no

# WINS Server - Tells the NMBD components of Samba to be a WINS Client
# Note: Samba can be either a WINS Server, or a WINS Client, but NOT both
;   wins server = w.x.y.z

# This will prevent nmbd to search for NetBIOS names through DNS.
   dns proxy = no

#### Networking ####
   hosts deny = all
   hosts allow = 192.168.33.

# The specific set of interfaces / networks to bind to
# This can be either the interface name or an IP address/netmask;
# interface names are normally preferred
;   interfaces = 127.0.0.0/8 eth0

# Only bind to the named interfaces and/or networks; you must use the
# 'interfaces' option above to use this.
# It is recommended that you enable this feature if your Samba machine is
# not protected by a firewall or is a firewall itself.  However, this
# option cannot handle dynamic or non-broadcast interfaces correctly.
;   bind interfaces only = yes
   printing = cups
   printcap name = cups


#### Debugging/Accounting ####

# This tells Samba to use a separate log file for each machine
# that connects
   log file = /var/log/samba/log.%m

# Cap the size of the individual log files (in KiB).
   max log size = 1000
# If you want Samba to only log through syslog then set the following
# parameter to 'yes'.
#   syslog only = no

# We want Samba to log a minimum amount of information to syslog. Everything
# should go to /var/log/samba/log.{smbd,nmbd} instead. If you want to log
# through syslog you should set the following parameter to something higher.
   syslog = 0

# Do something sensible when Samba crashes: mail the admin a backtrace
   panic action = /usr/share/samba/panic-action %d

####### Authentication #######

# Server role. Defines in which mode Samba will operate. Possible
# values are "standalone server", "member server", "classic primary
# domain controller", "classic backup domain controller", "active
# directory domain controller".
#
# Most people will want "standalone sever" or "member server".
# Running as "active directory domain controller" will require first
# running "samba-tool domain provision" to wipe databases and create a
# new domain.
   server role = standalone server

# If you are using encrypted passwords, Samba will need to know what
# password database type you are using.
   passdb backend = tdbsam

   obey pam restrictions = yes

# This boolean parameter controls whether Samba attempts to sync the Unix
# password with the SMB password when the encrypted SMB password in the
# passdb is changed.
   unix password sync = yes

# For Unix password sync to work on a Debian GNU/Linux system, the following
# parameters must be set (thanks to Ian Kahan <<kahan@informatik.tu-muenchen.de> for
# sending the correct chat script for the passwd program in Debian Sarge).
   passwd program = /usr/bin/passwd %u
   passwd chat = *Enter\snew\s*\spassword:* %n\n *Retype\snew\s*\spassword:* %n\n *password\supdated\ssuccessfully* .

# This boolean controls whether PAM will be used for password changes
# when requested by an SMB client instead of the program listed in
# 'passwd program'. The default is 'no'.
   pam password change = yes

# This option controls how unsuccessful authentication attempts are mapped
# to anonymous connections
   map to guest = bad user
   usershare allow guests = yes


[share]
   comment = share directory
   browseable = yes
   path = /media/hdd1/share
   read only = no
   available = yes
   guest ok = yes
   create mask = 0666
   directory mask = 0666

[printers]
   comment = All Printers
   browseable = no
   path = /var/spool/samba
   printable = yes
   guest ok = yes         ### この設定を間違えたせいで PDF が印刷できなかった
   read only = yes
   create mask = 0700

# Windows clients look for this share name as a source of downloadable
# printer drivers
[print$]
   comment = Printer Drivers
   path = /var/lib/samba/printers
   browseable = yes
   read only = yes
   guest ok = no
# Uncomment to allow remote administration of Windows print drivers.
# You may need to replace 'lpadmin' with the name of the group your
# admin users are members of.
# Please note that you also need to set appropriate Unix permissions
# to the drivers directory for these users to have write rights in it
   write list = root, @lpadmin
   admin users = @lpadmin
後は,サービスを再起動するか,システムを再起動すれば設定が反映される.
接続方法
Windows の場合は,「ネットワーク」にアクセスすることで,しばらくすると表示されるはずである.もし,表示されなければ,「コンピュータ」から「ネットワークドライブの割り当て」を選択し,「フォルダー」に「\\[Raspberry Pi の IP アドレス]\share」と入力する.ここでは,「\\192.168.33.12\share」とすれば良い.この時,「share」は,Samba の「comment = share directory」の 1 行上にある「share」を指す.名前を変えた場合は,注意すること.
Linux の場合は,場所バーに「smb://[Raspberry Pi の IP アドレス]/share」と入力すれば接続されるはずである.
次回
次回は,上にも記述してある「この設定を間違えたせいで PDF が印刷できなかった」という部分について説明しようと思う.
Raspberry Pi 3 Model B でファイルサーバーとプリンタサーバーを構築する(その 2) CUPS とプリンタドライバのインストール
どうも,筆者です.
前回の続きである. workspacememory.hatenablog.com
使用しているプリンタは,「EPSON PX-501A」である.これは,USB 接続であるので,Raspberry Pi に接続し設定をする事で,スマホやノート PC などから印刷を出来るようにするのが目的である.history を参考にしつつ,思い出しながら書いていくので,この通りにやって上手くいくかが怪しい.
CUPS のインストール
まず,CUPS をインストールする.CUPS だけでは足りないらしいので,必要そうなものも一緒にインストールする.
sudo apt-get install -y cups cups-devel cups-pdf python-cups avahi-discover
後から,CUPS の設定の際に,ユーザーが必要になるらしいので,以下のようにして,対応するグループに追加しておく.そして,サービスを開始する.
# ユーザーの追加
sudo usermod -aG lpadmin pi
# サービスの開始
sudo /etc/init.d/cups start
sudo /etc/init.d/avahi-daemon start
次に,CUPS の設定ファイル「/etc/cups/cupsd.conf」を以下のように変更する.
#
#
# Sample configuration file for the CUPS scheduler.  See "man cupsd.conf" for a
# complete description of this file.
#

# Log general information in error_log - change "warn" to "debug"
# for troubleshooting...
###LogLevel warn
LogLevel debug

# Deactivate CUPS' internal logrotating, as we provide a better one, especially
# LogLevel debug2 gets usable now
MaxLogSize 0

# Only listen for connections from the local machine.
#Listen localhost:631 ### コメントアウト
Port 631              ### 追加する
Listen /var/run/cups/cups.sock

# Show shared printers on the local network.
Browsing On
BrowseLocalProtocols dnssd

# Default authentication type, when authentication is required...
DefaultAuthType Basic

# Web interface setting...
WebInterface Yes

# Restrict access to the server...
<Location />
  Order allow,deny
  Allow @local        ### 追加する
</Location>
 Restrict access to the admin pages...
<Location /admin>
  Order allow,deny
  Allow @local        ### 追加する
</Location>

# Restrict access to configuration files...
<Location /admin/conf>
  AuthType Default
  Require user @SYSTEM
  Order allow,deny
  Allow @local        ### 追加する
</Location>
書き換えが終わったら,サービスを再起動する.
sudo /etc/init.d/cups restart
ここまでは,Raspberry Pi をプリントサーバ化 を参考にした.
これで,CUPS の設定は半分終わった.次に,プリンタを CUPS に追加すればよいのだが,CUPS に「EPSON PX-501A」のドライバが無かったので,この段階でインストールしておく.このドライバのインストールでかなり苦労した.
プリンタドライバのインストール
まず,Raspberry Pi 用のドライバが見つからない.自分で書くわけにはいかないので,EPSON Download Center から頑張ってソースコードを探す.PX-501A の場合は,モジュール名が,「ESC/P-R Driver (generic driver)」であるものをダウンロードする.設定を行っている段階では,「epson-inkjet-printer-escpr-1.6.11-1lsb3.2.tar.gz」であった.今は,1.6.12 が出ているらしい.
次に,make で止まるので,あらかじめ以下をインストールしておく.これは,EpsonのプリンタドライバをRasPi用にビルドしたよー を参考にした.
# configure 用
sudo apt-get install libtool autoconf
# cups/cups.h が見つからないときの対策
sudo apt-get install libcups2-dev
# cups/raster.h が見つからないときの対策
sudo apt-get install libcupsimage2-dev
後は,解凍して,インストールの準備を行う.この時,PPD ファイルを該当するディレクトリにコピーしておく.
tar zxvf epson-inkjet-printer-escpr-1.6.11-1lsb3.2.tar.gz
pushd epson-inkjet-printer-escpr-1.6.11/

# PPD ファイルのコピー
sudo cp -f ppd/Epson-PX-501A-epson-escpr-en.ppd /usr/share/ppd/cupsfilters/

# configure を行う
./configure --prefix=/usr

# make を行う(しばらく時間がかかる)
make

# install を行う
sudo make install
popd
これで,ドライバがインストールされたことになる.後は,Web ブラウザから,プリンタの設定を行えばよい.
CUPS からプリンタを追加
ウェブブラウザ(Windows や Linux など Raspberry Pi 以外でもよい)で「http://[Raspberry Pi の IP アドレス]:631」にアクセスする.ここでは,Raspberry Pi の IP アドレスを「192.168.33.12」にしたので,
http://192.168.33.12:631
とすれば良い.プリンタの電源を入れて,「管理」メニューから「プリンタの追加」からプリンタを追加する.USB で接続されたプリンタ(EPSON PX-501A)が表示されるはずなので,選択し,続ける.
次のページでは,「このプリンターを共有する」にチェックを入れて続ける.
次のページで,ドライバを追加したので,「または PPD ファイルを提供」から,「/usr/share/ppd/cupsfilters/」にある PPD ファイルを選択する.
最後に自動設定を選択し,設定が完了する.試しに,テストページを印刷しておこう.
次回
次回は,Samba の設定を行い,Windows 側で共有が行えるようにする.また,SD にアクセスし続けると寿命が縮むので,外付け HDD にアクセスするよう設定する. このとき,一箇所だけ設定を間違え,Windows で PDF が印刷できない問題が生じたので,そのことについても別の記事で説明する予定である.